As we all know selenium supports
android testing and below I will demonstrate opening a Google page in android
emulator.
Go to Eclipse IDE
and perform the below mentioned steps
1.
Help-> Install New Software..
·
Click on “Add…” button
·
Name : Enter name
<<Android_Plugin>>
·
Location: Enter the URL https://dl-ssl.google.com/android/eclipse/
·
Click on “Ok” button

·
Click on “Select All” button or
check all the check boxes
·
Click on “Next” button

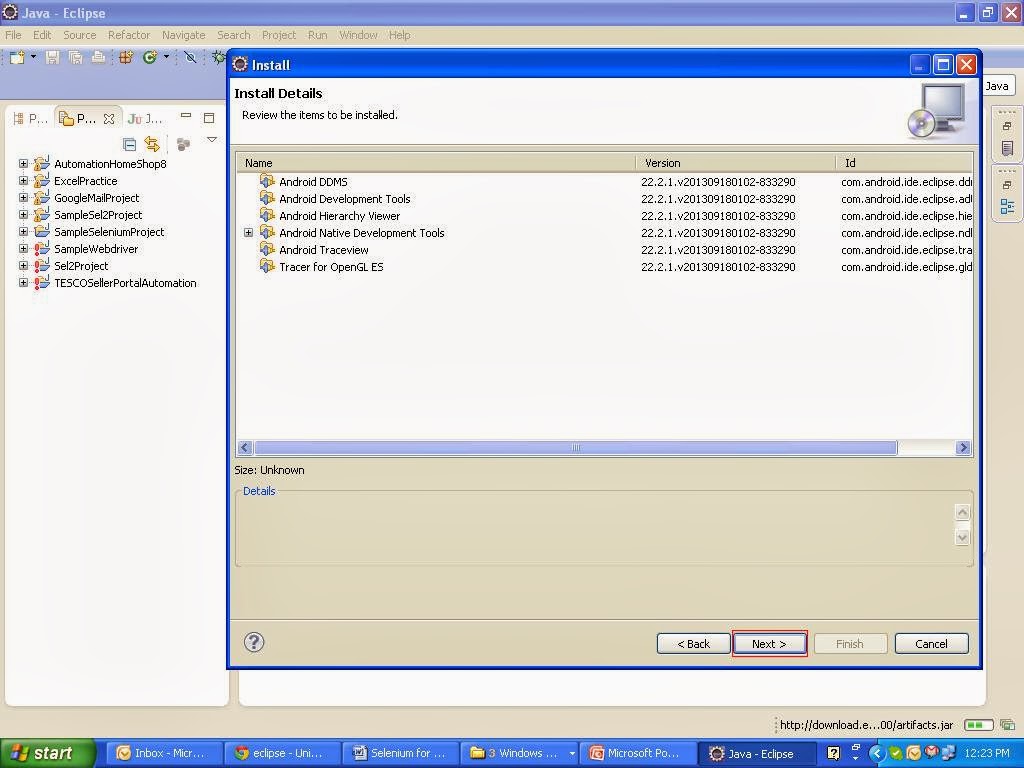
After importing the android plug-in
the below screen will be displayed, click on “Next” button
Select the “I accept the terms of
license agreement” radio button and click on “Finish” button

Wait until the software is
installed, If it throws any warning click “OK” button. After the installation
it will ask for the restart eclipse, Click on “Yes” button.

After the eclipse restart perform
the below steps
2. Windows-> Preferences
·
Select “Android“ in left side tree options
·
Click on “Browse” button in front of SDK Location text box
·
Select downloaded file “android-sdk-windows”
·
Click on “OK” button
·
Click on
“Apply” and “OK” button as below

Ex: <<
C:\android-sdk-windows>>
Note: The downloaded “android-sdk-windows”file
should contain the “android-17” in platforms folder.
If the file does not contain
the“android-17” in platforms folder the perform the below steps.
- Windows-> Android SDK Manager
o Select all the Available Packages in Android SDK Manager
o Like Tools, Android 4.3 (API 18), Android 4.2.2 (API 17)
etc..
o Click on “Install Packages…”
Installation
will take some time, after installation close the Android SDK Manager window
- Navigate to “android-sdk-windows” file Ex:
C:\android-sdk-windows\platforms and check for “android-17” folder exists.
3. Download “android-server-2.21.0.apk
” from the following locationhttp://code.google.com/p/selenium/downloads/list and Copy the
downloaded file into folder “C:\ android-sdk-windows\platform-tools”.
4.
Navigate to Eclipse IDE Windows >> Android Virtual Device Manage
· Click on “New…” button
· Enter AVD Name:
<<Sample1>>
· Select Device: <<Nexus One
(3.7”, 480 * 800: hdpi)>>
· Select Target: <<Android 4.2.2
– API Level 17>>
· Click
on “OK” button
- Select the added Android Virtual device and click on “Start” button and click on “Launch” button, the emulator will start opening as below

- For the first time it will take quite long time to open emulator. Once the emulator is opened close the Android Virtual Device Manager window. The emulator looks like below

5.
Run the “Command Prompt” as administrator and execute the below commands
· Execute“cd C:\ android-sdk-windows \platform-tools”
· Execute the command “adb install android-server-2.21.0. apk”

- We also need to set up Port forwarding, run the command “adb forward tcp:8080 tcp:8080"

6.
After the APK install successfully the WebDriver icon will appear in emulator.
Click on the WebDriver app on Emulator and this will make the android server
available at “http://localhost:8080/wd/hub”.Opening
this URL in Firefox will show up a blank page on success.

Now create new project for android and copy the below script
which just opens the google page in emulator.
package
com.Google.Adroid;
import
java.util.Properties;
import
java.util.concurrent.TimeUnit;
import
junit.framework.TestCase;
import
org.openqa.selenium.By;
import
org.openqa.selenium.android.AndroidDriver;
public class
AndroidSampleProj extends TestCase {
static Properties prop =
System.getProperties();
public void testProj() throws Exception {
// Retrieve
the project absolute class path
prop.setProperty("",
getClassPath());
System.out.println(getClassPath());
// Android
Instance creation
AndroidDriver
driv = new AndroidDriver();
// Implicit
wait
driv.manage().timeouts().implicitlyWait(30,
TimeUnit.SECONDS);
// AUT AppURL
driv.get("http://www.Google.com");
// Assertion
for Link presence.
assert
driv.findElement(By.linkText("work")).isDisplayed();
// Click on
the work link
driv.findElement(By.linkText("work")).click();
// Log the Page title
System.out.println("Page
Title : " + driv.getTitle());
// Quitting
the Android Web Driver
driv.quit();
}
static String
getClassPath() {
// TODO
Auto-generated method stub
return prop.getProperty("java.class.path", null);
}
}
Right click and select option Run As >> 2 JUnit Test
and the script runs perfectly

No comments:
Post a Comment